Building Nature at Home – The Heart of DIY Habitats
There’s something deeply satisfying about building a habitat with your own hands. You’re not just setting up a tank or an enclosure—you’re creating a world. When I first started building enclosures for my own turtles and fish, I realized that each piece of rock, driftwood, or sand wasn’t just décor—it was a decision that affected behavior, comfort, and even health. That’s the heart of DIY habitats: blending form, function, and a personal touch that no store-bought setup can replicate.
A well-designed DIY habitat is a living ecosystem, not a decorative display. It moves, breathes, and changes. The plants sway in the current, algae grow in patterns, and your pets explore their environment with curiosity. When you build this kind of home, you stop being just an owner and start becoming a caretaker of something much larger—something alive.
Table of Contents
The Philosophy Behind DIY Habitats
People often think DIY means cheap. That’s not the goal here. The real reason to go DIY is control. You decide what materials go in, what the layout looks like, and how the animals interact with their surroundings. You can fine-tune everything—from the texture of the substrate to the slope of a basking area—to mimic the kind of environment your pets would find in the wild.
For example, if you’re keeping a red-eared slider, you’ll want a balance of shallow water for resting and deeper sections for swimming. Add a few smooth river stones and a piece of cork bark, and suddenly, it’s more than a tank—it’s a microcosm of a pond in summer. A musk turtle, on the other hand, prefers murky, shaded areas, so driftwood, leaf litter, and darker substrates make it feel secure.
Why Materials Matter
Every material you choose has a story—and a consequence. The wrong gravel can trap waste and cloud the water. Certain woods can release tannins that alter pH. Even silicone sealants differ in toxicity. In a DIY setup, every decision has a ripple effect.
Think of it like building a house for a friend. You wouldn’t use materials that could harm them or make their life uncomfortable. The same principle applies here. Glass, slate, untreated wood, and natural stones are generally safe starting points. Avoid painted objects, metals that rust, or anything with sharp edges.
This attention to material safety is not just about keeping your animals alive—it’s about letting them thrive. When the foundation feels natural and secure, their instincts kick in. A turtle will bask longer. A fish will explore more freely. Even the shy ones—like the African butterfly fish or Kuhli loach—start to show off their natural behavior once they feel safe.
Building Connection Through Creation
There’s a kind of quiet joy in this process that you don’t get from buying a ready-made setup. When you stack a rock just right, or carve a ramp that fits perfectly under a basking lamp, you start to understand your pets differently. You learn their habits, their quirks, and even their moods.
I remember once watching a yellow-bellied slider spend half an hour trying to wedge itself under a piece of driftwood I’d added that morning. At first, I thought it was stuck—but no, that was its new favorite nap spot. That’s the beauty of it: you create something, and they make it their own.
That’s also why perfection isn’t the goal. A slightly uneven rock, a bit of algae on the glass, or a plant that grows wild—it’s all part of the natural charm. Nature isn’t sterile. It’s imperfect, dynamic, and ever-changing. When your DIY habitat embraces that, it becomes something beautiful.
Understanding the Role of Functionality
A good habitat isn’t just natural-looking—it’s functional. Water should circulate smoothly. Land areas should dry between basking sessions. Materials should resist mold, retain stability, and support the needs of your animals.
Here’s a little checklist I keep in mind whenever I start a new build:
- Safety first: No sharp edges, toxic paints, or metals.
- Stability: Make sure every rock and platform can handle your pet’s weight.
- Natural layout: Arrange elements to mimic streams, ponds, or wetlands.
- Easy maintenance: Design for cleaning access and drainage.
- Visual flow: Let the eye travel naturally through the environment.
The magic happens when everything serves a purpose yet feels spontaneous—like a slice of nature brought indoors.
The Emotional Reward
Let’s be honest: building a DIY habitat can be messy, frustrating, and full of trial and error. You’ll spill sand, overcut wood, or realize a basking platform sinks after you fill the tank. But when it’s done—and your turtle climbs onto a rock you shaped by hand or your betta weaves through plants you anchored yourself—it’s worth every second.
That sense of connection can’t be bought. You feel it when you turn on the light in the morning and see your creation come alive. You feel it when you watch your fish dart through the shadows, or your turtle close its eyes under the warmth of a lamp.
And over time, the habitat changes. Plants spread. Rocks shift slightly. The animals add their own touch. It becomes a collaboration—a shared space between your vision and their instincts.
Why It’s Worth Doing
DIY habitats push you to think beyond the surface. You’re not just replicating nature—you’re studying it, translating it, living it in miniature. You learn patience, observation, and creativity. You also save money, but more importantly, you build something unique and personal.
Whether it’s a painted turtle basking on a slate shelf, or a group of guppies weaving through dense java fern, you’ll see how much they appreciate the environment you built with your own hands.
This is where it all begins—with curiosity, a little bit of courage, and a pile of materials waiting to become something alive.
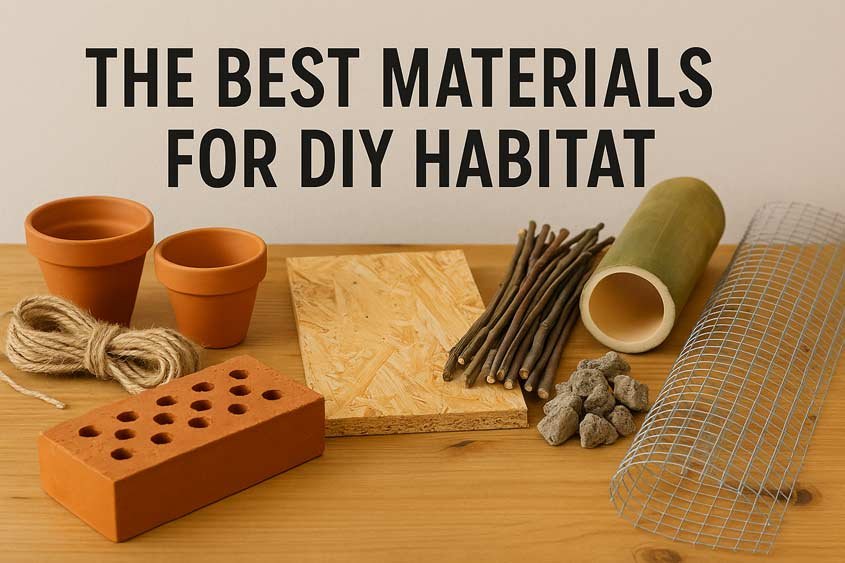
Foundations of a Safe and Natural Habitat
Every great DIY habitat starts with a solid foundation—literally. You can’t build something that feels natural or lasts long without understanding the base layers and structural materials that make everything else possible. Whether you’re crafting a turtle terrarium, a paludarium, or an aquarium that mimics a living riverbank, safety and stability come before aesthetics. Once those are in place, the natural beauty follows on its own.
Choosing the Right Base Material
When you’re building from scratch, your first decision is the tank or enclosure material. Most people default to glass, and for good reason. It’s durable, clear, and doesn’t warp over time. It’s also easy to clean and safe for both turtles and fish. But glass can be heavy and difficult to modify. If you’re planning a larger build or an outdoor setup, acrylic may be a better choice. It’s lighter, easier to drill, and provides great insulation, though it does scratch more easily.
Some experienced keepers even build partial habitats using wood and pond liner, especially for semi-aquatic species like yellow-bellied sliders or cooters. If you go that route, make sure to seal every joint and coat the interior with a non-toxic waterproof sealant. Always choose materials rated for aquarium or terrarium use—never construction-grade paint or resin, which can leach chemicals.
Materials Checklist for the Base
- Glass tank or acrylic enclosure
- Aquarium-safe silicone
- Non-toxic waterproof sealant
- Level stand or platform to prevent uneven pressure
- Optional: wood frame or pond liner for custom builds
Each of these elements ensures your habitat remains watertight, stable, and safe—no slow leaks or stress cracks months down the line.
Structuring Land and Water Divisions
If you’re keeping both aquatic and semi-aquatic animals, like map turtles or mud turtles, you’ll need a clear division between land and water zones. This is one of the trickiest parts of any DIY habitat because it must balance function, safety, and aesthetics.
Some hobbyists create land using stacked rocks, but this can get unstable fast. A better long-term option is a built-up land platform made of lightweight materials like PVC sheets or egg-crate panels covered with river rocks, sand, or eco-earth. This keeps weight low while maintaining a natural look.
Design Tips for Stability
- Use silicone to anchor heavier structures.
- Create gentle slopes rather than sharp drops between zones.
- Leave enough depth in the water for swimming—at least 1.5 times the turtle’s shell length.
- Test every rock for wobble before filling the tank.
A well-balanced structure mimics nature and makes your pets feel more confident. You’ll notice how a turtle glides from water to land smoothly when it feels secure underfoot.
Selecting Safe Substrates
Your choice of substrate can make or break your setup. It’s not just decoration—it affects filtration, digging behavior, and even water chemistry. For turtles, avoid gravel small enough to swallow. Instead, use smooth river stones, fine sand, or bare-bottom sections for easier cleaning.
If your habitat houses fish as well—like corydoras, gouramis, or killifish—fine sand is often best. It allows plants to root easily and prevents debris from settling deep where it’s hard to remove.
For terrestrial or basking zones, materials like coconut fiber, topsoil (without fertilizer), or reptile-safe moss help maintain humidity and cushion land areas.
Good Substrate Pairings
- Aquatic areas: Pool filter sand or fine gravel
- Semi-aquatic: River stones with sand overlay
- Land zones: Organic soil mix or coconut husk
- Planted tanks: Aquarium soil with a gravel cap
Mix and layer these to mimic natural gradients—just like you’d find along a riverbank or pond edge.
Considering Water Safety and Quality
No matter how solid your build, water quality is the lifeblood of any mixed habitat. It keeps your fish healthy, your turtles active, and your plants thriving. Poor filtration or stagnant areas can lead to algae blooms, cloudy water, or worse—disease.
The simplest system for a DIY setup is a canister or internal filter rated for double your tank size. For example, if your setup holds 100 liters, pick a filter meant for 200 liters. This gives you a buffer for waste-heavy pets like turtles.
Water Quality Essentials
- Use a dechlorinator before filling the tank.
- Maintain steady water temperatures (24–28°C for most species).
- Rinse filter media in tank water, not tap water.
- Test weekly for ammonia, nitrite, and nitrate.
It’s tempting to think natural setups don’t need much maintenance—but even wild ponds filter through layers of soil, roots, and bacteria. Your job is to recreate that balance.
Incorporating Natural Textures
Don’t underestimate how much surface texture affects animal comfort. Turtles love to grip rough rocks and climb over driftwood. Fish like plecos or shrimp graze on biofilm that grows on natural surfaces.
Use driftwood, slate, and lava rock to create texture without sharp edges. These materials also promote beneficial bacterial colonies that keep your ecosystem stable. Avoid anything painted, coated, or treated with varnish.
If you want to add variety, terracotta pots, clay tiles, and unpolished stones can work beautifully. They look natural, hold heat well, and provide great shelter zones.
Bringing It All Together
A safe and natural habitat is about creating trust. When your animals feel secure in their surroundings, they behave naturally—basking more, feeding regularly, exploring freely. That’s when you know you’ve done it right.
You’ll also notice that once you get the foundation perfect—solid, stable, and safe—the rest of your habitat practically builds itself. Plants grow better, cleaning becomes easier, and the whole system feels more alive.
That’s the quiet power of a good foundation. It doesn’t draw attention, but everything depends on it.
Natural Materials That Bring Life and Texture
Once your habitat’s foundation is secure, it’s time to focus on the materials that bring personality, realism, and life to the enclosure. Natural textures and elements aren’t just for looks—they affect behavior, comfort, and even health for turtles, fish, and aquatic invertebrates. From driftwood to moss to river stones, the choices you make here define how your pets interact with their environment.
Driftwood and Branches
Driftwood is one of the most versatile materials for DIY habitats. It provides hiding spots, climbing areas, and surfaces for algae and biofilm to grow. Many species, like red-eared sliders and Amano shrimp, love to explore driftwood. It also slowly releases tannins into the water, slightly lowering pH in a way that mimics natural ponds and streams.
Tips for using driftwood effectively:
- Soak first: Driftwood can float initially, so soak it for several days to weeks to ensure it sinks.
- Anchor if necessary: Large pieces may need aquarium-safe silicone or rocks to hold them in place.
- Choose smooth surfaces: Avoid splintered edges that could injure turtles or fish.
Driftwood isn’t just functional—it’s aesthetic. Twisting branches and gnarly shapes give the tank a lived-in, natural feel, almost like peeking into a forest stream.
Stones, Rocks, and Slate
Rocks provide both visual interest and practical utility. They form basking areas for turtles, create hiding nooks for fish, and add structure for planted aquariums. Slate, river rocks, and lava stone are all excellent options, as long as they’re inert and safe for your species.
Rock Placement Tips:
- Stack with care: Make sure rocks are stable to avoid collapses.
- Layer naturally: Sloping arrangements look more realistic than flat piles.
- Combine textures: Mix smooth stones with rougher rocks for a variety of surfaces.
Rocks also encourage natural behaviors. For example, musk turtles love to wedge themselves into tight crevices, and certain cichlids enjoy digging around stones, which helps mimic their native habitat.
Substrate and Ground Cover
The substrate sets the stage for everything else. Fine sand, aquarium soil, and eco-earth are popular choices, each with their pros and cons. Sand is ideal for bottom dwellers like Corydoras or Kuhli loaches, while soil allows plants to root and grow dense foliage.
Layering substrates can create a realistic gradient from shallow to deep water zones. For semi-aquatic turtles, consider:
- Shallow sandy areas for easy access to water
- Soil or coco fiber for land zones to maintain humidity
- Small pebbles for drainage and texture
A thoughtfully chosen substrate also helps maintain water chemistry and supports beneficial bacterial colonies, which are critical for a healthy habitat.
Moss, Leaf Litter, and Plant Matter
Adding mosses, fallen leaves, and natural detritus transforms a habitat from a bare box into a living ecosystem. Java moss, Christmas moss, and other hardy species provide hiding spots for shrimp and fry, stabilize small plants, and improve the aesthetic of natural flow.
Leaf litter—like oak or Indian almond leaves—offers:
- Tannins that slightly acidify water
- Microhabitats for shrimp, snails, and fish fry
- Slow decomposition that feeds microorganisms and creates a living substrate
Not only do these additions enrich the environment visually, but they also help animals feel secure. Turtles may dig under leaves, and fish dart through moss like they would in a stream or pond.
Combining Materials for Natural Flow
The real artistry comes in blending these elements. A single piece of driftwood surrounded by moss and layered stones can become a mini ecosystem. Adding plants like Anubias, Java fern, or small floating species adds depth and movement. The goal is a habitat that feels organic, not staged.
Quick Layering Guide:
- Base layer: Substrate (sand, soil, or eco-earth)
- Mid-layer: Stones and rocks for structure
- Top layer: Driftwood, branches, moss, and leaf litter
- Optional: Floating plants for surface cover
Experimentation is part of the process. Shift stones, trim moss, or rotate plants to see how your turtles and fish respond. Often, they’ll guide you—if a turtle constantly pushes a branch aside, that’s where it wants access. If shrimp avoid an area, you might need more cover or smoother surfaces.
Benefits Beyond Aesthetics
These natural materials do more than look good. They promote:
- Exploration and activity for pets
- Behavioral enrichment, like digging, climbing, or grazing
- Stable water chemistry through tannins and microbial colonies
- Easier maintenance since bacteria and biofilm help break down waste
When done right, your DIY habitat becomes a miniature ecosystem. The fish, turtles, and invertebrates interact with their environment naturally, and you get the satisfaction of watching life unfold in a space you created.
The next step is to think about decor and enrichment in a budget-friendly way, so we can make these habitats thrive without emptying your wallet.
Budget-Friendly Enrichment and Decor
Once your foundation is secure and you’ve layered in natural materials, it’s time to make your DIY habitat truly engaging for your turtles and fish. Enrichment isn’t just about aesthetics—it’s about creating opportunities for exploration, exercise, and natural behavior. And the best part? You don’t need to spend a fortune. Many functional and attractive elements can be sourced from around your home, local nature, or affordable pet supplies.
Hiding Spots and Caves
Turtles, fish, and invertebrates all appreciate places to retreat. Hiding spots reduce stress, mimic natural environments, and encourage activity. Fortunately, there are plenty of low-cost options.
Natural options:
- Driftwood or branches arranged to create tunnels
- Stacked stones or slate slabs forming crevices
- Coconut shells cut in half or hollowed logs
DIY alternatives:
- Repurpose PVC pipes as caves or tunnels for shy species like musk turtles or shrimp
- Small clay pots placed sideways for fish hiding spaces
- Egg cartons or cardboard structures (lined with aquarium-safe silicone for wet areas)
Caves and nooks are significant for territorial fish like cichlids, giving them private spaces without constant confrontation. Even turtles enjoy slipping under a log or between rocks to rest or warm up.
Floating and Climbing Structures
Floating platforms or climbing areas add vertical dimension and more interactive surfaces. They’re inexpensive and often DIY-friendly.
- Cork bark pieces can float naturally, creating resting platforms for turtles.
- Plastic mesh or netting covered in moss allows climbing and grazing for small invertebrates.
- Lightweight driftwood anchored to the substrate can act as both décor and exercise equipment.
These structures encourage movement, which keeps pets healthy and engaged. Watching a red-eared slider climb onto a floating platform or a group of guppies weave through hanging moss gives you a clear sense of how enrichment benefits behavior.
Plant Placement and Variety
Plants are enrichment and décor rolled into one. They provide cover, grazing surfaces, and aesthetic depth. Fast-growing, hardy plants like Java fern, Anubias, or water sprite are perfect for beginners and can be attached to rocks or driftwood with inexpensive thread or fishing line.
Tips for budget plant enrichment:
- Propagate cuttings from friends or local aquatic clubs.
- Use small floating plants like duckweed or frogbit to create shaded zones.
- Mix soft-leaved plants with tougher species to accommodate nibbling turtles.
Not only do plants improve water quality by absorbing nitrates, but they also create microhabitats that mimic a real riverbank or pond floor.
Sensory and Behavioral Stimulation
Enrichment goes beyond hiding and climbing. Small additions can simulate natural conditions and stimulate curiosity:
- Pebble or sand piles for digging behavior in turtles or bottom-dwelling fish
- Leaf litter for exploration and grazing by shrimp and fry
- Small floating leaves or logs that move with water currents, encouraging interaction
Rotating these elements periodically keeps the environment dynamic and prevents boredom. Even minor changes—a new stone, a piece of driftwood in a different spot—can trigger curiosity and activity in your pets.
Cost-Saving Strategies
You don’t need to buy expensive store décor to create a dynamic habitat. Many natural or recycled items work beautifully:
- Collect safe rocks, stones, and driftwood from local rivers or lakes (ensure no contamination).
- Reuse glass jars, small pots, or even ceramic pieces as hiding spots.
- Use scrap wood or repurpose small furniture pieces to create platforms or ramps.
By prioritizing safe, natural, and inexpensive materials, you get double value: enrichment for your pets and a habitat that looks unique without breaking the bank.
Combining Aesthetics and Function
The trick is blending functionality with visual appeal. Arrange materials so they create a sense of depth and mystery—rocks leading into a moss-covered cave, floating logs casting shadows on the substrate, plants swaying in the current. Your habitat should feel layered and alive, like a tiny ecosystem rather than a simple container.
Quick Decor Checklist:
- Hiding spots for security and stress reduction
- Climbing or floating platforms for exercise
- Variety of plant species for cover and grazing
- Rotating items to stimulate curiosity
- Recycled or natural materials to stay budget-friendly
With these elements, your DIY habitat becomes a place where turtles bask, fish explore, and shrimp graze—all in a naturalistic, stimulating environment.
Maintenance and Health on a Budget
A beautiful DIY habitat is only as good as the care it receives. Maintenance and health management don’t have to be expensive or complicated, but they are essential for the long-term success of your turtles, fish, and invertebrates. With a few smart strategies, you can keep your habitat thriving while sticking to a budget, ensuring your pets stay active, healthy, and happy.
Water Quality and Filtration
Water is the lifeblood of any aquatic or semi-aquatic habitat. Dirty or stagnant water stresses animals, encourages disease, and stunts plant growth. Maintaining clean water doesn’t always require high-end equipment—strategic placement and routine care can go a long way.
Budget-friendly filtration tips:
- Choose a filter rated for twice the volume of your tank; you’ll get better water turnover without needing multiple units.
- Use sponge pre-filters or DIY filter media bags filled with ceramic rings or bio-balls for biological filtration.
- Rinse media in tank water, not tap water, to preserve beneficial bacteria.
- Consider low-cost surface skimmers or powerheads to improve circulation.
Even small turtles like musk turtles produce significant waste, so a robust filter combined with regular water changes—about 25% weekly—is critical. For heavily planted tanks, plants themselves can aid filtration by absorbing nitrates and stabilizing water chemistry.
Monitoring Water Parameters
Cheap test kits are widely available and essential. Ammonia, nitrite, nitrate, and pH should be monitored regularly. You don’t need the most expensive digital meters; reliable liquid test kits are sufficient for most setups.
- Ammonia: 0 ppm
- Nitrite: 0 ppm
- Nitrate: <40 ppm for turtles, <20 ppm for sensitive fish
- pH: Species-dependent, usually 6.5–7.5 for freshwater setups
Keeping a simple log of readings helps you detect trends before problems become emergencies. A steady hand and consistent routine often trump high-tech monitoring tools.
Routine Cleaning
Cleaning doesn’t have to be costly. Properly layered substrates and strategically placed decorations reduce the need for intensive scrubbing. Some practical strategies:
- Use a gravel vacuum for substrate cleaning during water changes.
- Scrape algae from glass and rocks with inexpensive scrapers or toothbrushes.
- Remove uneaten food promptly to prevent fouling.
Turtles like red-eared sliders and cooters tend to stir up sediment, so partial water changes combined with substrate rinsing are more effective than frequent full-tank cleanouts. This approach saves time, reduces stress for your animals, and limits the amount of water wasted.
Health Monitoring
Healthy animals are active, feed well, and interact with their environment. Low-cost, proactive health checks can prevent expensive veterinary bills.
- Observe behavior daily: Is your turtle basking, swimming, or hiding excessively? Are your fish darting erratically or hiding constantly?
- Check for physical signs: Clear eyes, smooth shells, and intact fins are indicators of good health.
- Quarantine new arrivals: Even a simple 2–4 week quarantine can prevent disease outbreaks.
Adding natural enrichment like driftwood, plants, and caves helps reduce stress, which in turn lowers the risk of disease—another budget-friendly benefit.
DIY Solutions for Maintenance
Many maintenance tasks can be simplified with homemade solutions:
- Create a DIY siphon using aquarium tubing and a small pump for water changes.
- Use old jars or containers to soak driftwood or rocks before placing them in the tank.
- Reuse water from plant rinsing to top off the tank, reducing waste.
Even minor tweaks can save money and time without compromising the health of your habitat.
Seasonal and Long-Term Care
Different species and materials react to seasonal changes. Temperature, light, and humidity fluctuations affect turtle basking, plant growth, and fish metabolism. Affordable strategies include:
- Use timers for lighting to maintain consistent photoperiods.
- Add inexpensive ceramic heaters or submersible heaters for stable water temperatures.
- Monitor humidity in terrariums with DIY hygrometers or simple moisture gauges.
By understanding the needs of your species—whether it’s a yellow-bellied slider, a guppy school, or shrimp—you can anticipate challenges and make small adjustments that keep your habitat thriving year-round.
Balancing Cost and Care
The key takeaway is that thoughtful planning and observation often trump expensive products. Prioritize:
- Clean, safe water
- Regular monitoring of parameters
- Accessible hiding spots and enrichment
- Consistent feeding and observation
With these basics covered, your DIY habitat becomes a sustainable, self-regulating ecosystem. It allows your animals to behave naturally while keeping maintenance manageable and affordable.
Wrapping It Up – Creating Thriving DIY Habitats
After all the planning, layering, and enriching, your DIY habitat isn’t just a project—it’s a living space, a micro-ecosystem that reflects your effort, creativity, and understanding of nature. By now, you’ve seen how every decision—from choosing substrate to arranging driftwood—affects the health, behavior, and happiness of your turtles, fish, and invertebrates.
The Joy of Observation
There’s an undeniable satisfaction in watching your creations come to life. A red-eared slider slipping gracefully from water to basking rock, a school of guppies weaving through moss, or a musk turtle burrowing among leaves—it’s a form of reward that no store-bought tank can replicate. Each movement, each interaction, is a reminder that your DIY habitat works because it’s functional, natural, and tailored to the animals’ needs.
Lessons in Patience and Creativity
Building and maintaining DIY habitats teaches patience. Rocks shift, driftwood floats, algae blooms—nature isn’t perfect, and neither are DIY setups. But learning to adjust, adapt, and embrace imperfection is part of the process. Creativity also flourishes: repurposing materials, experimenting with layouts, and discovering new ways to enrich your pets keeps the project engaging.
Sustainability and Cost Efficiency
DIY habitats prove that creating a naturalistic environment doesn’t require endless spending. By using safe, inexpensive, or recycled materials, you achieve the dual goal of affordability and authenticity. Even routine maintenance can stay budget-friendly if approached thoughtfully: regular water changes, substrate cleaning, and careful observation prevent major problems before they arise.
Connection with Your Pets
Perhaps the most significant benefit is connection. When you’ve built every rock, platform, and plant placement, you develop an intuitive understanding of your animals’ preferences and behaviors. You start noticing subtle cues—a turtle’s favorite basking spot, a fish’s preferred hiding nook, or a shrimp’s grazing trail. This bond strengthens not only your care but also the well-being of your pets.
Continuous Growth and Adaptation
A DIY habitat is never truly “finished.” Plants grow, algae spreads, animals explore and modify their surroundings. Rotating décor, adjusting water flow, or adding new enrichment keeps the environment dynamic. This ongoing evolution mirrors natural ecosystems, making your habitat feel alive, vibrant, and ever-changing.
Final Thoughts
DIY habitats combine artistry, science, and compassion. They let you build more than just a home—they allow you to cultivate a thriving ecosystem tailored to the needs of your pets. Whether it’s a turtle terrarium with carefully layered basking platforms, a planted aquarium full of hiding spaces for fish and shrimp, or a hybrid setup blending land and water, the principles are the same: safety, functionality, natural materials, and enrichment.
By embracing these practices, you don’t just create a habitat—you create a space where your pets can flourish, where natural behavior is encouraged, and where your personal touch makes every corner unique. In the end, a thriving DIY habitat is more than a hobby; it’s a living testament to your dedication, curiosity, and love for the animals in your care.
This is where effort, observation, and creativity meet nature—and the results are always worth it.
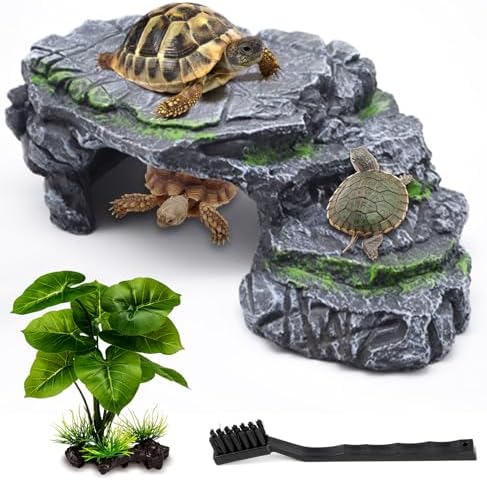
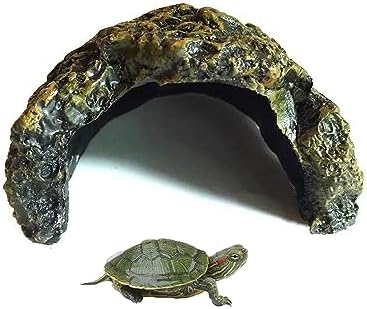
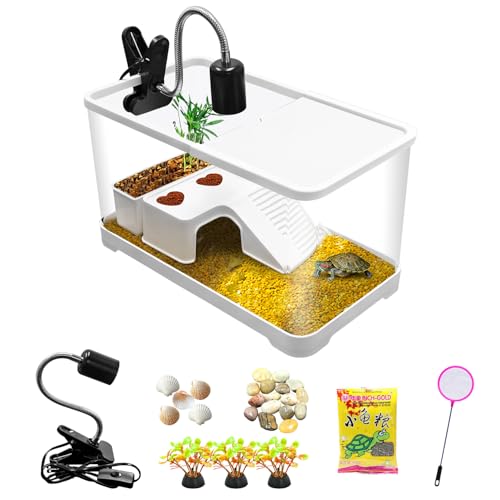
Best Seller Products On Amazon*