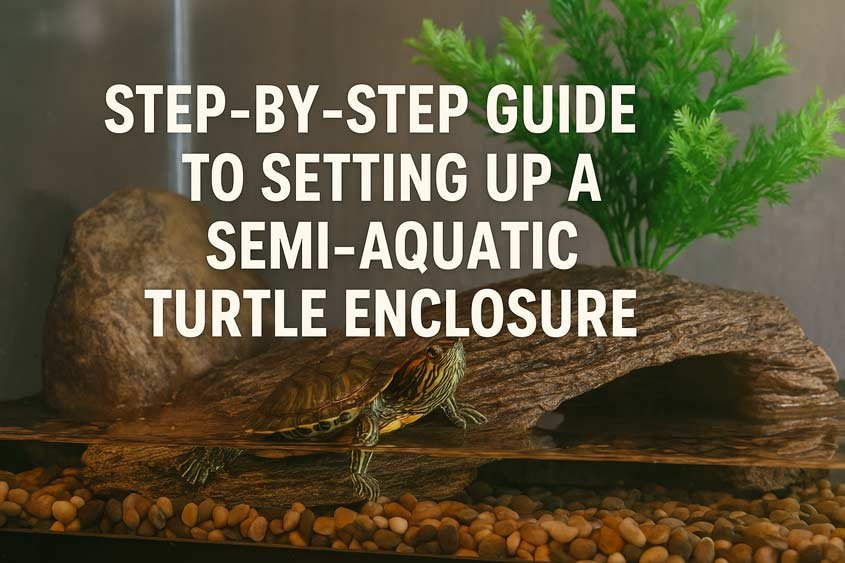
Creating the Perfect Home for Your Semi-Aquatic Turtle
There’s something deeply calming about watching a turtle glide through clear water, pause on a warm rock, then ease itself back into the shallows. Semi-aquatic turtles live in a world split between two elements—land and water—and when you create that world right in your home, you start to see how much personality they really have. Whether you’re caring for a curious Red-Eared Slider, a quiet Reeves Turtle, or a beautifully patterned Painted Turtle, their environment shapes everything—from how they eat and grow to how long they live.
A semi-aquatic turtle enclosure isn’t just a tank with water and a basking spot. It’s an ecosystem—a living, balanced space that needs to feel natural to your turtle. These animals have evolved to thrive in ponds, slow-moving rivers, and marshy areas. That means your setup should mimic those conditions as closely as possible. You’re recreating not only their habitat but their daily rhythm: basking in the sun, swimming in clean water, and resting on solid ground.
Table of Contents
Many beginners underestimate how much space these turtles need. That’s often the first mistake. Even a juvenile that fits in the palm of your hand will grow faster than you expect. A Red-Eared Slider, for example, can reach 25 centimeters (10 inches) in shell length. They need room to swim, turn comfortably, and explore. Think of your enclosure as their whole world—too small, and they’ll be stressed or inactive; too bare, and they’ll be bored.
Lighting and temperature are the next key ingredients. In nature, the sun provides everything—heat, light, and UVB rays that help turtles produce vitamin D3 and absorb calcium. Without that, their shells and bones weaken, leading to metabolic bone disease. So when you set up your turtle’s home, you’re not just adding a lamp—you’re recreating sunlight. A strong UVB bulb paired with a basking light is essential. You’ll want a clear gradient, too: one warm basking area around 32–35°C (90–95°F) and a cooler side in the low 20s. That difference encourages natural movement, just like they’d experience outdoors.
Water quality is another piece of the puzzle that can’t be ignored. Semi-aquatic turtles are messy eaters. They drag food into the water, kick up debris, and produce waste that quickly clouds the tank. A powerful filtration system keeps the water safe and reduces how often you need full cleanings. For larger turtles—say, a mature Yellow-Bellied Slider—a canister filter is ideal. It moves a lot of water efficiently and traps fine waste. Add a weekly partial water change, and your turtle will stay healthy and active.
When I first set up my own semi-aquatic turtle enclosure, I made the rookie mistake of using a basic aquarium filter meant for tropical fish. Within a week, the water looked like soup. Turtles are not goldfish. They need more filtration—three times stronger, at least. Once I upgraded to a canister filter and added some live plants for balance, the change was instant. Clear water, happier turtle.
Land space matters just as much as the water zone. A basking platform isn’t optional—it’s how your turtle regulates body temperature and dries off completely. Damp shells lead to rot or fungal growth over time. You can buy floating docks or build your own from cork bark, slate, or smooth stones. Just make sure it’s stable and easy to climb onto. Painted Turtles, in particular, love wide basking surfaces with strong light.
There’s also the question of aesthetics versus practicality. Sure, it’s tempting to create a picture-perfect display with exotic plants and fancy rocks. But turtles dig, push, and rearrange everything. A simple setup that mimics a muddy riverbank often works better. Think sturdy driftwood, smooth gravel, and a few hardy aquatic plants like Anubias or Java Fern. These survive both underwater and under the occasional turtle foot stomp.
Humidity, ventilation, and safety round out the list. Semi-aquatic turtles prefer moderate humidity—around 60–70%. You can maintain that by keeping the water warm and using a partial tank cover. Always secure the top with a solid lid or mesh screen, because even small turtles climb better than you think. One morning, I found my Reeves Turtle halfway across the floor after scaling a filter cord. Lesson learned: never underestimate determination.
So why put all this effort in? Because a well-designed semi-aquatic turtle enclosure doesn’t just look good—it creates stability. Stable heat, clean water, and plenty of space mean your turtle can live decades instead of years. It’s also about your own enjoyment. When your turtle feels at home, you’ll see behaviors you’d never expect: stretching under the heat lamp, chasing bubbles, even stacking on top of another turtle for the best basking spot.
In the end, setting up a turtle enclosure is part science, part art, and part patience. You’re building a world that reflects your turtle’s instincts, not just your taste. Get that right, and you’ll have a miniature wetland full of quiet motion and calm—a slice of nature right in your living room.
Choosing the Right Tank and Setup Space
If there’s one thing I’ve learned over years of keeping semi-aquatic turtles, it’s this: the tank you choose will decide everything else—how your turtle behaves, how easy maintenance becomes, and even how healthy your setup stays long term. You can’t build a thriving semi-aquatic turtle enclosure without first nailing the foundation, and that foundation is your tank.
Size and Shape Matter
People often underestimate how much space turtles need. It’s easy to look at a hatchling Red-Eared Slider, barely the size of a cookie, and assume a 20-gallon tank will last a while. But in a year or two, that little creature will outgrow it completely. Semi-aquatic turtles aren’t ornamental fish—they’re active, heavy-bodied reptiles that swim, dive, and bask for hours.
A general rule of thumb: 10 gallons of water per inch of shell length. So, if your turtle has a 6-inch shell, you’re already looking at a 60-gallon tank minimum. But I’ll be honest—bigger is always better. The difference in your turtle’s behavior is obvious. In small tanks, they pace and claw at the glass. In larger enclosures, they explore and rest naturally.
For most adult turtles:
- Red-Eared Slider or Yellow-Bellied Slider: 75–100 gallons minimum
- Painted Turtle: 55–75 gallons
- Musk or Reeves Turtle: 40–55 gallons (since they prefer shallower setups)
Horizontal space matters more than height. These turtles swim horizontally, not vertically, so choose a wide, long tank rather than a tall one. The extra floor space allows for smoother swimming and better basking platform placement.
Materials and Location
Most keepers go with glass tanks, and for good reason—they’re durable, easy to clean, and don’t warp under water pressure. Acrylic tanks are lighter and clearer but can scratch easily, especially when you’re scrubbing algae or moving decorations.
Where you put the tank matters, too. You want a spot away from drafts, loud noises, and direct sunlight (which can overheat the water fast). A corner of the room with stable temperature works best. Make sure the stand can handle the full weight—remember that 75 gallons of water weighs over 280 kilograms once you add substrate, rocks, and equipment. I’ve seen too many setups collapse because the table wasn’t built for that load.
Land-to-Water Ratio
A semi-aquatic turtle enclosure is all about balance. You’re trying to recreate a shoreline—half land, half water, with seamless transitions between them. Some species prefer more water, others more land.
Here’s a quick guide:
- Red-Eared Sliders & Painted Turtles: 70% water, 30% land
- Musk Turtles & Reeves Turtles: closer to 50/50 balance
- Map Turtles: about 80% water, with large basking platforms
It’s not a fixed rule, but a good starting point. If you notice your turtle spending most of its time in one area, adjust accordingly. Observation always beats theory.
- Use smooth river rocks or slate to elevate the land area.
- Keep edges gradual—turtles should be able to climb easily.
- Always ensure the basking zone is completely dry.
Filtration and Circulation Basics
If you take only one maintenance lesson from me, let it be this: turtles are messy. They eat in the water, defecate in the water, and shed skin and shell flakes into the water. Without a strong filter, your beautiful setup turns swampy in days.
You want a filter rated for at least twice the tank’s actual volume. For example, a 75-gallon enclosure should have a filter meant for 150 gallons. That gives you the extra flow needed to handle turtle waste.
Reliable filter types include:
- Canister filters: Powerful, quiet, and handle large tanks well. Great for Sliders and larger species.
- Internal/submersible filters: Compact and easy to maintain for smaller setups.
- Hang-on-back filters: Work fine for hatchlings or secondary tanks but struggle with adult waste loads.
Don’t forget about water circulation. A small pump or wavemaker helps prevent stagnant spots, especially in corner-heavy enclosures. It also keeps the water oxygenated and the temperature evenly distributed.
Filtration checklist:
- Use fine and coarse media for debris and bacteria balance.
- Clean filter sponges every two weeks.
- Replace carbon or chemical media monthly.
- Partial water changes (20–30%) weekly.
A Note on Tank Lids and Safety
Turtles are curious climbers. It’s shocking how far a determined one can reach with just a bit of leverage. A secure lid prevents escapes, protects from falling objects, and keeps pets or children from tampering. I prefer wire mesh tops—they let heat and humidity flow freely but still keep everyone inside safe.
Once, I had a small Painted Turtle named Clover who managed to crawl out overnight through a tiny gap between the basking dock and the tank rim. Found her under the couch in the morning, dusty but proud. Since then, every tank I set up has a proper fitted lid. Lesson learned.
Putting It All Together
So, picture this: a 90-gallon glass tank along a quiet wall, half filled with clean, filtered water, a wide cork platform basking under warm UVB light, and a few smooth rocks that break the water’s surface. The pump hums softly, water circulates gently, and a turtle stretches lazily under the heat. That’s what you’re aiming for—not just functionality, but a habitat that feels alive.
Once your tank and space are ready, the next step is to bring it to life—adding land, water features, lighting, and all the subtle details that make a semi-aquatic turtle enclosure feel like home.
Crafting the Ideal Habitat – Land, Water, and Basking Areas
Setting up the habitat is the moment everything starts to feel real. The tank goes from being just glass and water to something alive—something that looks like a piece of nature. This is where your turtle’s world takes shape. The goal is to create an enclosure that balances function and realism, blending the wet and dry zones into one flowing environment. A proper semi-aquatic turtle enclosure isn’t split into halves—it’s one unified ecosystem.
Building the Basking Platform
The basking area is the heart of the enclosure. It’s where your turtle warms up, digests food, dries its shell, and soaks in UVB rays. Without a proper basking platform, even the best filter and heater won’t keep your turtle healthy.
You’ve got several options:
- Floating docks: These are easy to install and adjust as the water level changes. Great for species like Red-Eared Sliders, who love to climb up and stretch out under the light.
- Fixed platforms: Built from rock, slate, or stacked bricks, they’re sturdy and natural-looking. Ideal for Painted Turtles or Reeves Turtles who prefer stable footing.
- DIY options: Cork bark, driftwood, or resin ramps can create a more organic look. Just make sure they’re securely anchored—turtles will shove and nudge until something gives.
Your basking zone should be completely dry, slightly elevated, and directly beneath your UVB and heat lamps. Keep the temperature around 32–35°C (90–95°F). The rest of the enclosure should gradually cool down to about 24°C (75°F) in the water. That temperature difference helps your turtle regulate body heat naturally.
One trick I’ve used for years: position the heat lamp slightly off-center, not directly above the basking area. It creates a gradient of warmth that turtles love—they’ll shift positions until they find the perfect spot.
Checklist for the basking platform:
- Surface large enough for the turtle’s entire body
- Stable and non-slip texture
- Easy ramp access
- Positioned under UVB and heat lamps
Creating a Natural Land Area
A good land area gives your turtle a break from swimming. Even if they spend most of their time in the water, they need to dry off and explore. For semi-aquatic species, this doesn’t have to be a large beach—it can be a raised platform or an island with soft substrate.
Substrate options:
- Smooth river gravel (safe and easy to clean)
- Fine sand mixed with soil (great for digging species)
- Large pebbles (for aesthetics, but less natural for nesting)
Avoid sharp gravel or anything small enough to be swallowed. I once saw a young slider ingest aquarium gravel and require veterinary help—it’s not worth the risk.
If you want to take it a step further, add a few hardy plants to the land zone. Pothos, peace lilies, or spider plants can survive the humid air around the tank. They also help with water quality by absorbing nitrates.
A few scattered rocks or branches give your turtle something to climb on. Musk Turtles, in particular, love wedging themselves under logs or resting half-submerged on stones. Think of it as a playground—simple, but enriching.
Land zone ideas:
- Partially buried rocks for stability
- Driftwood bridges connecting to water
- Shallow slope transitions rather than steep drops
Setting Up the Water Zone
Now for the main attraction—the water. This is where your turtle spends most of its time, so getting it right is critical. Start with the depth: deep enough for swimming but shallow enough that the turtle can easily reach the surface for air. Most adults do well with 25–30 cm (10–12 inches) of water, though strong swimmers like Map Turtles prefer deeper setups.
Water parameters:
- Temperature: 24–28°C (75–82°F)
- pH: between 6.8 and 7.8
- Use a water conditioner to remove chlorine and heavy metals
Add a submersible heater with a guard to prevent burns and a thermometer to monitor temperature. I prefer digital thermometers—they’re more accurate and easier to read.
Decorate with smooth rocks, submerged driftwood, and aquatic plants. Anubias, Java Fern, and Hornwort are excellent choices—they don’t need much light and withstand nibbling. They also provide natural cover, giving your turtle a sense of security.
Just make sure every item is turtle-safe. Avoid resin ornaments meant for fish tanks; turtles are strong enough to crack or tip them over. I’ve had a curious Red-Eared Slider shove a hollow castle decoration straight into the filter intake once—it wasn’t pretty.
Lighting and Heating Setup
Lighting is what ties everything together. Without the right light, your turtle can’t process calcium, no matter how good its diet is. That’s where UVB comes in.
Lighting essentials:
- UVB bulb: Mimics natural sunlight; helps prevent shell deformities and metabolic bone disease. Replace every six months, even if it still lights up—the UVB output fades over time.
- Heat lamp: Provides warmth for basking.
- Day/night cycle: Keep lights on for 10–12 hours daily. Use a timer to mimic sunrise and sunset naturally.
For larger tanks, I like using dual dome fixtures—one for UVB and one for heat. They’re efficient and let you adjust each bulb independently. You can also add LED lighting for plants, just make sure it doesn’t overpower the UVB.
Quick guide:
- UVB bulb 10–12 hours daily
- Basking area 32–35°C (90–95°F)
- Ambient tank air around 26°C (78°F)
- Replace bulbs every 6 months
When you step back and look at it all together—the clean water, the textured land, the warm light pouring over the basking area—it starts to feel like a small riverbank brought to life.
Bringing Balance to the Habitat
A balanced semi-aquatic turtle enclosure isn’t static—it’s alive. The water moves, the temperature shifts, plants grow, and the turtle itself rearranges things constantly. Don’t aim for perfection; aim for natural flow. Every turtle has preferences. A Reeves Turtle might bask longer under direct heat, while a Painted Turtle might prefer gliding through vegetation.
After you’ve got your basic structure, take time to observe. Adjust the slope of the ramp, move a branch, raise the basking light a few inches—tiny tweaks make big differences.
Creating this kind of habitat takes patience, but once it’s done, it’s something special. You’re not just keeping a turtle—you’re keeping a slice of its world.
Essential Equipment and Maintenance Routine
There’s a certain satisfaction in hearing the low hum of a filter, the gentle movement of water, and knowing your turtle’s environment is stable and thriving. But that quiet harmony doesn’t happen by accident. It’s the result of the right tools and a consistent routine. A semi-aquatic turtle enclosure is a living system—water chemistry, temperature, and light all have to stay in sync. The good news is, once you set it up correctly, the maintenance becomes second nature.
Must-Have Gear
Every successful setup starts with solid equipment. You don’t need to buy everything the pet store clerk suggests—just the essentials that truly matter for a healthy, low-stress habitat.
Core equipment list:
- Filter: The single most important piece of gear. Go for a canister filter rated for at least double your tank volume. It keeps the water clear, oxygenated, and safe from harmful ammonia.
- Heater: A reliable submersible heater with a guard ensures consistent water temperature. Semi-aquatic turtles are cold-blooded, and cold water can cause lethargy or infections.
- UVB and heat lamps: These simulate sunlight. Without UVB, your turtle can’t synthesize vitamin D3, which means poor calcium absorption and soft shells.
- Thermometer and hygrometer: You can’t manage what you don’t measure. Digital ones are best for tracking temperature and humidity accurately.
- Water conditioner: Tap water often contains chlorine and metals. Conditioners neutralize these instantly, making it safe for both turtles and beneficial bacteria.
Optional but handy: a timer for lights (it prevents forgetful evenings), and a gravel vacuum for easy cleaning during partial water changes.
I remember once skipping a heater because the room felt “warm enough.” A week later, my Musk Turtle was sluggish, barely eating. Turns out the water had dropped to 20°C overnight. Lesson learned—never trust room temperature alone.
Water Quality Management
Good filtration only goes so far. To really keep the water safe, you need to monitor its chemistry. Turtles produce far more waste than fish, and that waste breaks down into ammonia, nitrite, and eventually nitrate. Without checks, those compounds build up and poison the water.
What to test:
- Ammonia: should be 0 ppm
- Nitrite: should be 0 ppm
- Nitrate: ideally under 40 ppm
- pH: between 6.8 and 7.8
Testing kits are inexpensive and easy to use—just dip a strip or add reagent drops to a sample. I test my turtle tanks weekly. It’s a small step that prevents big problems later.
If your water ever smells foul, turns cloudy, or your turtle’s eyes get irritated, that’s your warning sign. Usually, a combination of too much leftover food, a weak filter, or infrequent water changes is to blame.
Cleaning and Upkeep
The best cleaning schedule is one you can realistically stick to. Turtles don’t need crystal-clear water 24/7, but they do need stability.
Weekly routine:
- Remove uneaten food and visible waste
- Vacuum the substrate lightly
- Replace 20–30% of the tank water with dechlorinated, temperature-matched water
- Check filters and wipe away algae from glass
Monthly routine:
- Clean filter media in tank water (never under tap water—it kills beneficial bacteria)
- Inspect heater and lighting fixtures
- Deep-clean basking platform and decorations if needed
Over time, you’ll notice patterns. The water might cloud faster in summer because of higher temperatures or slower in winter due to reduced feeding. Adjust your routine accordingly.
Troubleshooting Common Issues
Even well-maintained setups occasionally hit bumps. The trick is learning to read the signs early.
Problem: Green algae bloom on glass and decorations
Fix: Reduce light exposure, add live plants, and increase water flow. Algae thrive on excess nutrients and stagnant water.
Problem: Murky or cloudy water
Fix: Check filter performance and feeding habits. Overfeeding is the usual culprit. Switch to feeding your turtle in a separate container or use floating feeding trays.
Problem: Foul odor
Fix: Clean uneaten food daily and check substrate for trapped waste. Odor almost always points to decaying organic matter.
Problem: White film or foam
Fix: Indicates protein buildup from waste or food oils. Increase filtration or add surface agitation with a pump.
Quick maintenance checklist:
- Clean filter media monthly
- Change 25% of water weekly
- Wipe down glass and decorations
- Monitor ammonia and pH regularly
The Role of Live Plants and Bio-Balance
Adding live plants isn’t just about aesthetics—they’re functional members of your enclosure’s ecosystem. Plants like Hornwort, Anubias, and Java Fern absorb nitrates, release oxygen, and outcompete algae for nutrients. They help balance the system naturally.
Just be aware that turtles are bulldozers. They’ll nibble, dig, and uproot anything not anchored. I once planted a beautiful cluster of Amazon Swords—my slider treated it like a salad bar within hours. After that, I switched to hardy, anchored species tied to driftwood. Much better results.
Long-Term Care Habits
Think of your maintenance routine as part of your turtle’s rhythm. Every task—feeding, cleaning, adjusting lights—becomes a kind of quiet ritual. And the payoff? Crystal-clear water, a healthy turtle, and a setup that runs smoothly with minimal intervention.
Once your equipment is dialed in and your schedule consistent, caring for a semi-aquatic turtle enclosure feels effortless. You stop reacting to problems and start fine-tuning harmony.
And there’s something deeply satisfying about that moment—sitting back, watching your turtle climb onto its basking platform under golden light, knowing the environment you’ve built is working exactly as nature intended.
Decorating for Enrichment and Natural Behavior
A semi-aquatic turtle thrives in a habitat that feels natural and mentally stimulating. Decoration is not just for looks—it plays a vital role in encouraging activity, curiosity, and healthy instincts. When you design the tank, think of it as recreating a small piece of the turtle’s natural world.
Add Hiding Spots and Shelters
Turtles need places to hide and feel secure. Include driftwood, smooth rocks, and caves. You can use commercial turtle hides or make your own using slate or PVC structures. Position them both in water and on land so your turtle has safe zones in every part of its habitat. Avoid sharp or rough materials that can damage the shell.
Use Aquatic and Terrestrial Plants
Live plants create a realistic environment while improving water quality. Aquatic plants such as Anubias, Java fern, and Hornwort tolerate turtle activity and help filter nitrates. On land, you can use sturdy, non-toxic plants like Spider plants or Pothos in pots placed above the waterline. If your turtle tends to uproot or eat plants, use artificial silk plants instead of plastic ones to prevent injury.
Provide Climbing and Exploration Features
Semi-aquatic turtles enjoy climbing onto logs, sloped rocks, and platforms. These structures allow them to explore and strengthen muscles. Floating cork bark or turtle docks are ideal since they move slightly, mimicking natural floating debris. Just make sure every surface is stable and accessible for easy movement between land and water.
Add a Variety of Substrates
The tank floor can combine smooth river stones, sand, and bare-bottom sections. Sand allows for natural digging, while smooth stones prevent ingestion hazards. Avoid gravel small enough for the turtle to swallow. A mix of textures keeps the habitat engaging and easy to clean.
Encourage Foraging Behavior
Scatter food or place leafy greens on floating platforms to make feeding more interactive. Occasionally rearrange decorations or add new safe items to stimulate curiosity. These small changes help prevent boredom and promote mental health.
Maintain a Natural Look with Balance
Decorating a turtle tank is about balance—enough features for enrichment without overcrowding. Leave open swimming areas and maintain clear pathways between land, basking, and water zones. Every item should serve a purpose—either for comfort, enrichment, or environmental stability.
A well-decorated habitat encourages your turtle to act as it would in the wild—exploring, basking, hiding, and foraging. The result is a healthier, more active pet that feels at home in every part of its environment.
Keeping It Balanced – The Joy of a Thriving Turtle Habitat
There’s something special about watching a semi-aquatic turtle settle into a habitat that feels alive—one where land, water, light, and movement blend together naturally. When the environment you’ve built runs smoothly, you start to notice a kind of rhythm. The water stays clear, the basking light hits just right, and your turtle—whether it’s a Red-Eared Slider, Yellow-Bellied Turtle, or Reeves’ Turtle—glides effortlessly between its basking rock and swimming space as if it owns the place.
Harmony Between Nature and Care
A balanced turtle enclosure isn’t just about equipment and cleaning schedules. It’s about creating an ecosystem that supports both physical and behavioral health. When filtration, lighting, and nutrition are all in tune, everything stabilizes. You’ll spend less time fixing problems and more time simply enjoying your turtle being itself—curious, calm, and full of personality.
Signs of a Happy, Healthy Turtle
You’ll know you’ve struck the right balance when your turtle displays consistent habits and looks vibrant. Some good signs include:
- Active swimming and basking behavior
- Clear eyes and smooth, firm shell
- Regular appetite and clean skin
- Natural curiosity toward new objects or decorations
If you notice your turtle spending too much time out of the water, refusing food, or appearing lethargic, something might be off—maybe the water’s too cold, the light’s too weak, or the tank’s due for maintenance. Small tweaks usually restore harmony quickly.
The Reward of Observation
The longer you keep turtles, the more you’ll realize that their small daily patterns are stories in motion. The way a Map Turtle stretches under the basking lamp, or how a Painted Turtle methodically digs into the substrate before resting—these moments show trust. They show that your enclosure works not just as a tank, but as a home.
Why Balance Matters
Every enclosure develops its own rhythm over time. Once the nitrogen cycle is steady, plants begin to thrive, algae finds its place, and your turtle adapts to the micro-environment you’ve built. It’s a living balance—one that reflects your attention and care. You’re not just maintaining a tank; you’re curating a miniature world that mirrors the wetlands, ponds, and slow-moving rivers turtles evolved to inhabit.
A Living Connection
Keeping turtles teaches patience. It’s a slow, grounding hobby that rewards consistency more than speed. When you look at your setup—clear water, steady warmth, healthy movement—you see a direct reflection of your effort. That’s the joy of it all. A thriving semi-aquatic turtle enclosure isn’t just a display—it’s a living, breathing relationship between you, your turtle, and the ecosystem you’ve nurtured together.
When everything clicks—the light, the water, the quiet hum of the filter—it feels right. That’s when you know you’ve done it. You’ve created balance. And in that balance, your turtle doesn’t just live—it thrives.
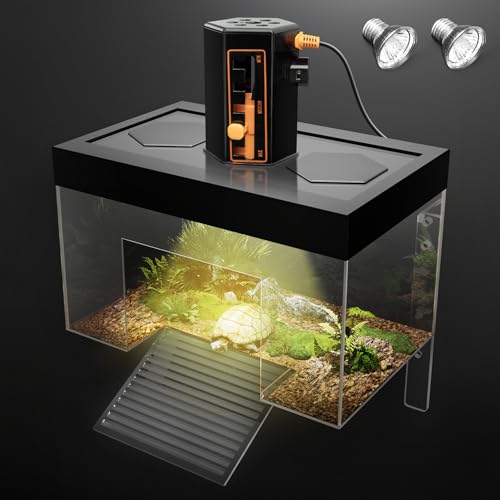
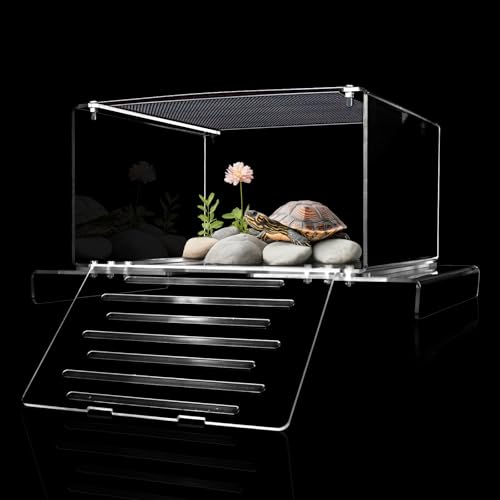
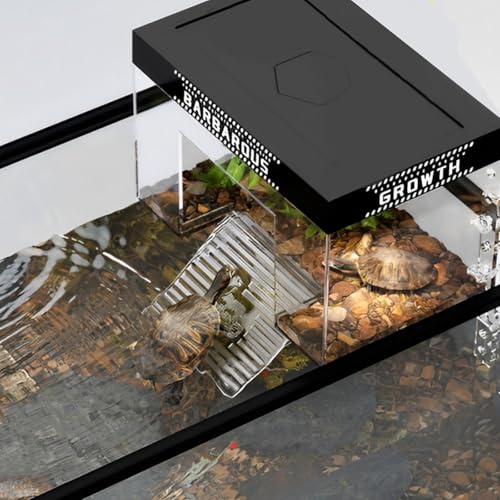
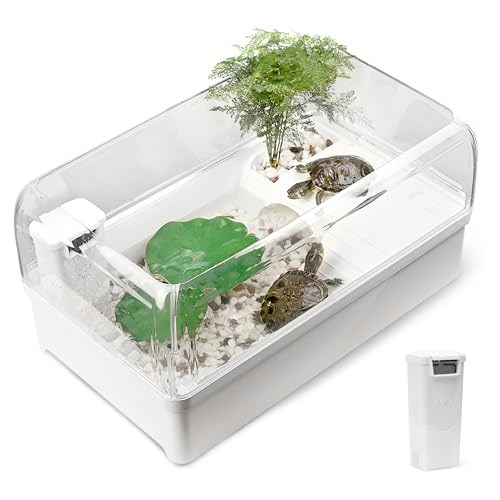
Best Seller Products On Amazon*